Camera Booth
DSLR camera array based human body reconstruction.
This is an engineering/experimental/student training project aiming at 3D human body reconstruction through photogrammetry approach.
Acknowledgment: Most of the hands-on (dirty) works are done by Deshan Gong (that handsome chap shown as our model) when he was a master student at Uni Bath. He also provided many beautiful images as raw materials, which are used/modified for figures on this page. WU Xiaokun co-supervised his master final project with his official supervisor Yongliang Yang during the summer of 2018, then helped him to wrap up this project into his final dissertation. During the prototyping stage (spring of 2018), Prof. Jieqing Feng and his students also gave us many valuable suggestions, especially during my visit of his lab at Zhejiang University at the end of April. The CAMERA group and the Alumni Fund supported this project.
Text and Typesetting: Xiaokun; Proofreader: Deshan.
Introduction
3D reconstruction is one of the major methods of modern content creation, which is widely studied in the research community and applied in industrial fields like film, game, VR, etc. Human body reconstruction is one of the most important topics, as nowadays people are asking for immersive experiences and interactions.
Photogrammetry route is one of the most mature technology, mainly due to the convenience nature of input 2D image acquisition - using a smartphone, for example.
Photogrammetry is the science of making measurements from photographs, especially for recovering the exact positions of surface points. – Wikipedia.
But it’s a very challenge task to apply photogrammetry algorithms for soft-body reconstruction tasks, including human body reconstruction. The main difficulties come from the potential movements of the target: if we use a single device to take multiple images of the target, there will be time gaps between each shot. As even subtle differences can cause misalignment between consecutive shots, which leads to an accumulated error in a long sequence and fail the algorithm.

Of course, there are much research works on non-rigid registration to attack this problem, but we focus on solving this problem in a relative brute-force yet more reliable way - we use multiple cameras to take shots simultaneously. In this project, we have tested many configurations starting from a small number of cameras to a moderate-large system consisting of 48 cameras.
System setup
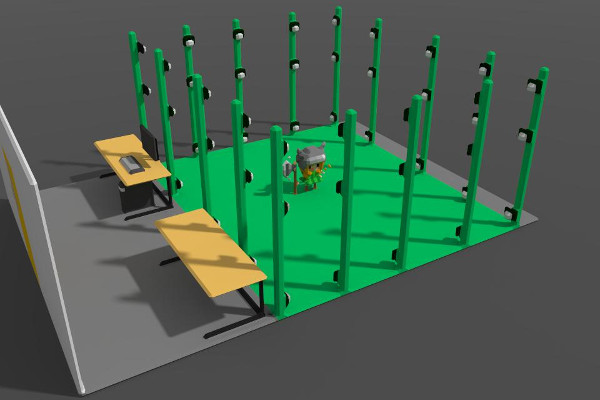
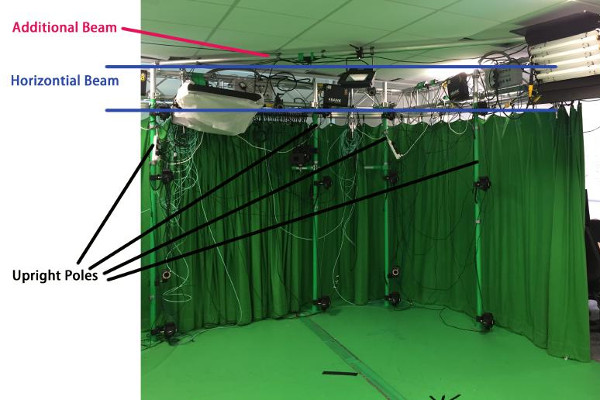
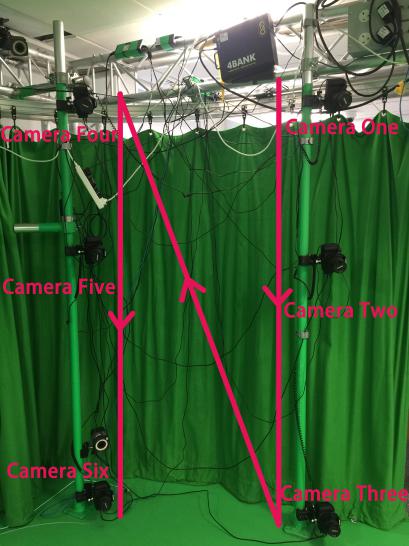
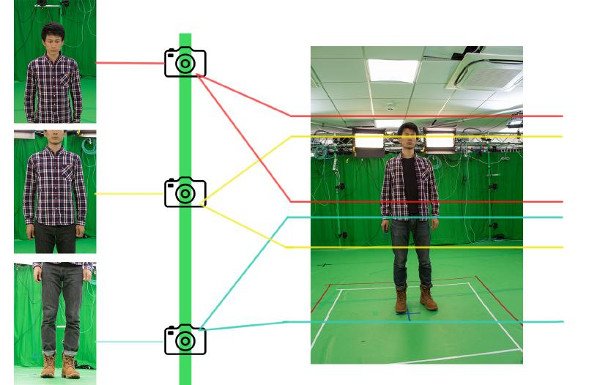
The studio of CAMERA group roughly looks like this:
To cover the target’s full body in as many view directions as possible, we spatially partition the poles into 8 uniformly distributed groups (imagine from the top view of Fig~1). Each group contains the same number of cameras: we start from a simple 16-camera configuration, then gradually add cameras until the final 48-camera configuration. All the 8 groups are hardware chained together into a ring structure, and then connected to the server/power supply/shutter trigger.
Hardware connections
Attach cameras to the pole
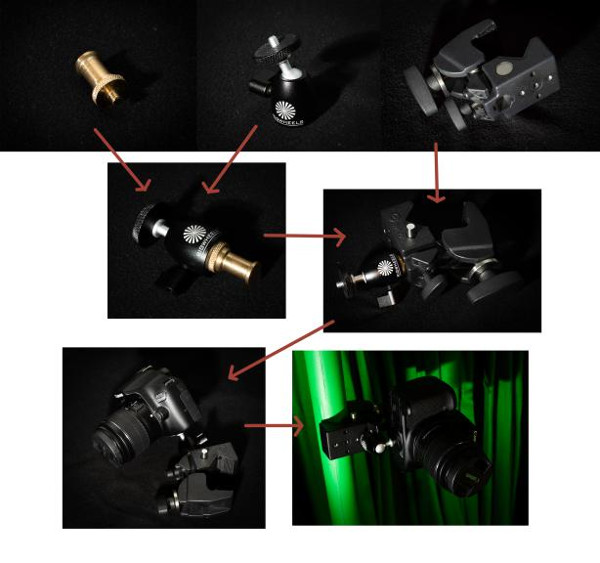
Standard socket-clamps are used to attach cameras to the poles.
Wiring interface
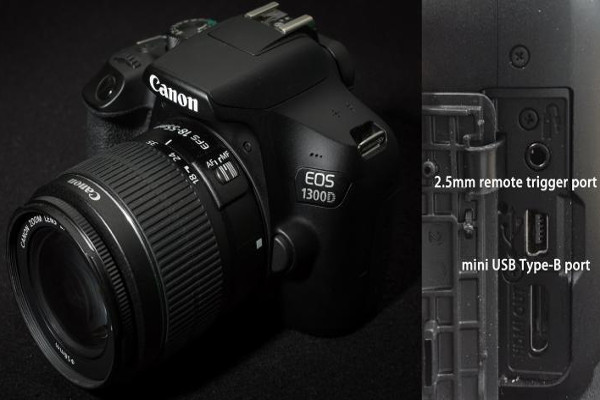
We use the same model of entry-level cameras in our project, which has three types of interfaces that we care:
- Trigger port for trigger shutter,
- Mini-USB port for data transfer,
- Power directly supplied from the fixed socket (we do not use batteries since we want to prevent sudden power-run-out-of problem).
Hardware synchronization
This is the biggest headache: we need to make sure the shutter of all the cameras is triggered simultaneously. After some research, we decided to go for a commercial solution:
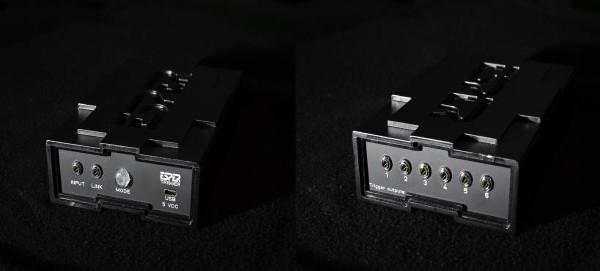
These trigger boxes are basically deconcentrator, which sends the input trigger signal to several outlets. It can also act as a relay, which amplify the input signal and pass onto the next hub. So we can build a hierarchical connection structure to host all the cameras, when the total number is greater than outlets on a single hub.
Data bandwidth
The data cables should be connected to USB hubs in a hierarchical structure, which gather all the links together into the USB ports of the server. But there is a bandwidth issue: a single USB port can only handle up to 16 data cables that topologically connected to it. As there are usually 2 USB ports on a single PCI-e card, we mounted two extra PCI-e cards onto our server, which can handle a maximum of 48 cameras simultaneously.
Also, the USB standard only allows a maximum of 3 level hubs daisy chained together, while the maximum USB cable length allowed is 5m, so there is an upper limit of 20m that data cable can reach. It’s not a problem in our case, as our studio is 6x7m. But people who are interested might need to consider that cables are best to go along the peripheral walls, if you do not want messy cables to go across your room.
Camera distribution
Here comes the first version of our capture system in full size: Fig~7 shows the camera numbering rule within a single group out of 8 groups in total.
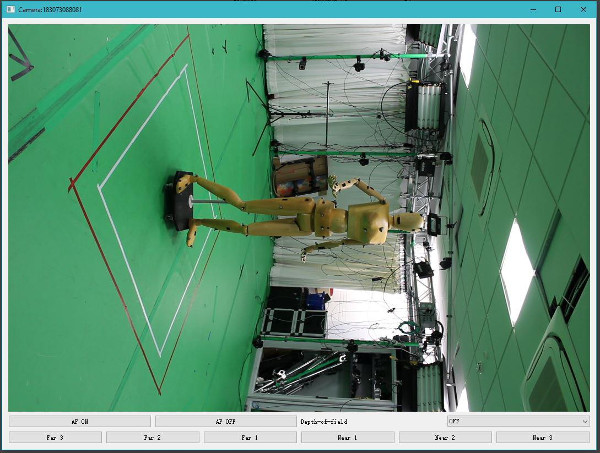
A sample shot of our model “Dotty” is shown below:
Software pipeline
Programming is not the major concern in this experimental project, so we compared the reconstruction quality of two well-known software:
Data preprocessing
Without any data preprocessing, the reconstruction results look not appealing (all the following two-column figures will be the same order if unspecified: PhotoScan on the left, while COLMAP on the right):
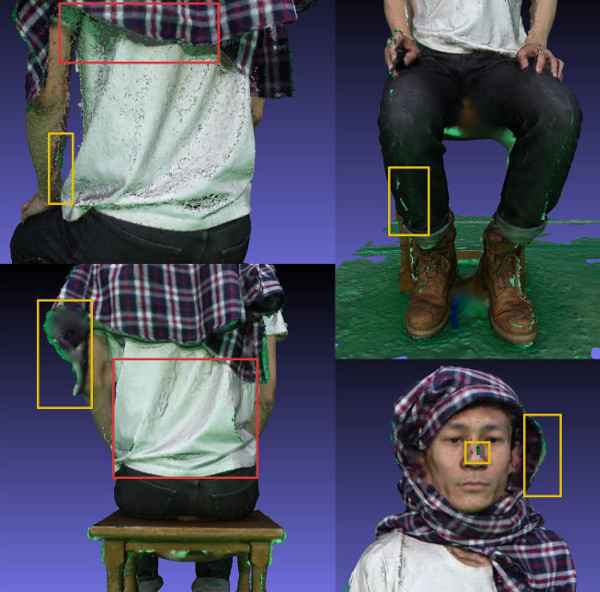
- The most catchy problem is that even with the green background, both software is not very good at segmentation: you can see many small patches (outliers) extruding from the mesh.
- If you zoom in and inspect carefully, the texture looks green tinted, i.e. color bleeding problem.
It’s recommended to preprocess the input images first and eliminate above mentioned two problems. This step is rather tedious and error-prone, so Deshan recorded a video to show the detailed steps:
Camera reconfiguration: a trial and error approach
We also found another problem during our test:
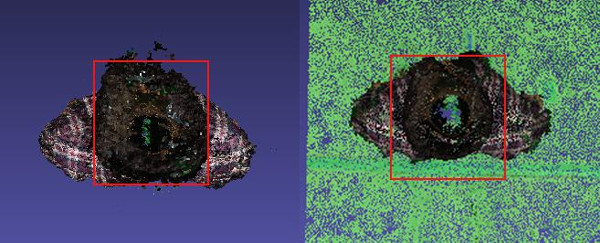
The top of the head is missing data, so we make two hypotheses:
- There are no cameras shooting from above in our first trials.
- Limitation of photogrammetry approach itself for hair reconstruction.
So we first moved cameras on the top to the ceiling rails (upper part is before, while the lower part is after):

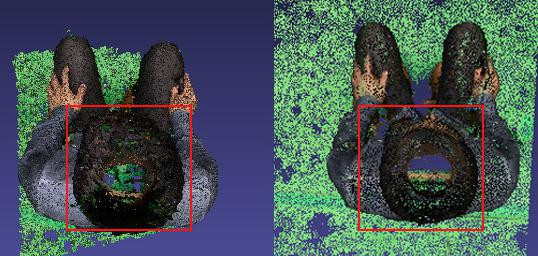
We also asked our model to sit, but the reconstruction result is still missing data on top:
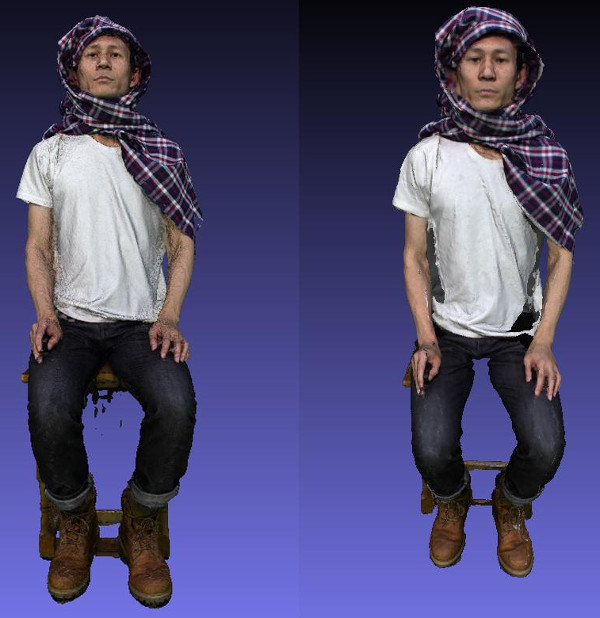
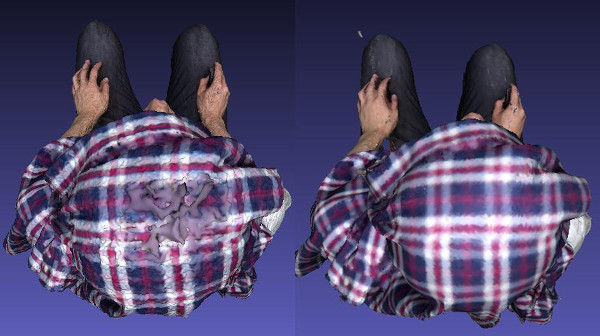
To test if the second hypothesis holds, we asked our model to cover his head with cloth (high-roughness). We also use Poisson Surface Reconstruction to regenerate geometry, then the result looks much better now:
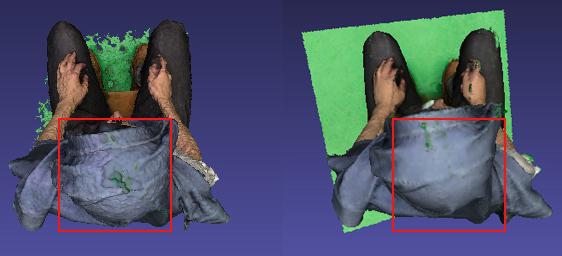
So we will always ask our models to wear a hat for final results if possible, especially when he/she does not like a hollow top.
Note: covering the hair is generally a good guild-line, since:
- Hair reconstruction is itself a very difficult research problem.
- Most peoples hair is mildly reflective, and reflective materials are the enemy of photogrammetry.
After several rounds of tweaking, we finally arrived at a configuration roughly looks like this:
Camera parameter settings
After thorough tests, the best camera parameter settings used in our final configuration:
- One-shot AF,
- Av w/ f/8.0,
- ISO: 100,
- Metering: Center-weighted average
- White balance: Auto,
- Exposure compensation: 0.
Results
Comments:
- COLMAP produces better quality results in general.
- PhotoScan is more robust, especially when the distance between adjacent photos are large (which violates the basic theoretical stereo pair assumption).
- PhotoScan produces results with more noise, while COLMAP produces results with more gap.
Future works
For the future works, the following points are worth considering:
- Image preprocessing automation: the current manual approach is a pain.
- Adding cameras specially targeted at the face, e.g. a stereo pair of high-end cameras: the face is usually the most catchy part of human body reconstruction, so it might worth to invest more in this.